Hi Lori
Many thanks for your suggestion. I think I need to spend more time with the Fashioner at a later date, once I gain more knowledge of garment construction. It looks really powerful and I can appreciate the usefulness of it going forward.
Thank you so much to you ( and your team? ) for creating such detailed pieces of software.
In the meantime, I continue to attempt my granddaughters summer school dress. We just drew the missing line in and then manually added 2cm each side of the centre of the front pattern to allow for the zip enclosure at the top. Instead of ‘cutting on the fold’, we constructed 2 separate pieces with the extra 2cm each side of centre.
Using the exact measurements from the set, I printed out the garment and stuck it all together with cellotape. I then drove 15miles to visit my granddaughter and me and my wife had some fun trying to get the paper dress to fit. You guessed it, it didn’t fit at all. We double checked the measurements set to her actual body measurements and the actual print size and all correlated fine. To get the paper dress to ‘fit’, we had to cut up the middle of the front, full length. This then made it a little easier to get it over her arms. We then realised that maybe the pattern is called a ‘knit’ dress for a reason, even though we specified minimal stretch in the output. We are using Gingham cotton ( poly cotton ? ) and although it does have a little movement, it is no way a stretch material. Maybe the ‘knit’ dress is a close fitted garment? We read the info on your site and realised we needed to add ‘ease’ to make it more looser fitting. With the paper garment on her body, we measured approx the ease needed. We then added this to the software output and then proceeded to print the new version of the dress. We transferred this onto the prewashed and ironed fabric and carefully cut the 6 pieces out. ( arms later once she tries on this new fabric prototype. ). It was a little difficult getting the small squares of the Gingham fabric to line up at the seams. Of course it cannot match perfectly due to the curves in the pattern. The main thing was to get the small squares vertical to avoid a ‘twisted look’. We used a basting stitch at lower tension just to hold the fabric together for testing and this will pull out easy before we final stitch. We started with the obvious straight seams first and stitched up the front leaving a 14in gap at the top for the zip layer on. We attached the two pieces of the sides along the straight edges and did this for both sides. 4 pieces of fabric now became 2. Then came the fun bit….. seaming the curves. I attempted one curved seam and it didn’t fit. I have obviously done something wrong. I have done ‘curved’ sleeves before on my only other attempted T-shirt garment and these stitched up fine. I think it’s my lack of garment construction where I’m struggling. I used the old paper template as my guide but things still didn’t fit quite right. I retired for the evening.
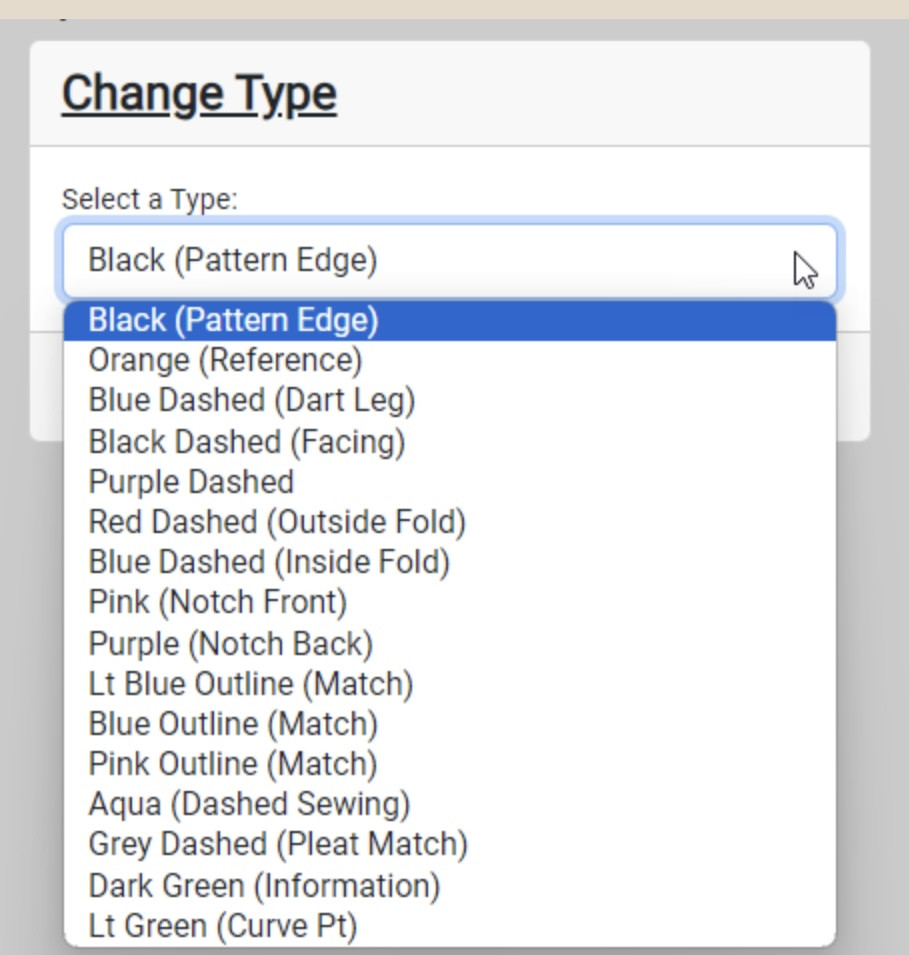
A fresh new day and enthusiasm has returned. What are all those coloured dots and circles on the printed patterns? Ahhh they mean something and a revisit to your ‘learning’ pages directed me to the following

Looks like my mistake was ignoring the printed info. I need to start matching up the dots to join the pieces correctly.
That is my next job once I get some more spare time.
I agree with you that the best way is to understand garment construction and now appreciate why you do not incl any instructions with your patterns. It’s the best way to learn.
I hope my mistakes I have shared above help others avoid the same pit falls and I hope that you do not mind me sharing my experiences as this may help other novice users and encourage them to try, which I understand is one of your reasons for having your site. Of course, apologies to all the more experienced users out there, but we all have to start from somewhere and I do hope that my experiences encourage others to give it a go. ( including other blokes ).
Again thank you so much for your help.
Best regards
Steve.